Home Decor Wall Art

Link up shout out to Tatertots and Jello
 via http://www.apinchofjoy.com/2016/05/busy-monday-218/
Happy Crafty Tuesday you all!
This week I'm going to share with you how to make a lovely 3D framed flower wall art hanging.
If you've been to my blog before you know well I am head over heels in love with paper crafts especially anything with paper flowers!
This is my second week in to Crafty Tuesdays and I wanted to start teaching not only how to create paper crafts like flowers, but also share how to use the finished paper craft in your home, as a gift, or event decor.
If you missed last Crafty Tuesday run over and check out how to DIY these Paper Hydrangeas! Go ahead I'll wait.. ;-)

Alright let's get to the supplies you will need for this project.
- Wood decorative frame. I found mine at Michael's Craft store if you have that near you. If not go to your local craft store and check in the wood working section. A lot of craft stores will have something similar. Choose whatever size you desire. I picked a rather large one because I wanted to hang it on my back door. If you are giving this as a gift maybe try and pick something a little smaller. And if you can't find a wood frame at all you can use a regular one and just leave out the glass!
- Paper or silk flowers. If you aren't into doing the leg work of making paper flowers, you can still make this project, just use silk instead! If you wish to use the paper flowers I used here are the template links... Ansley Rose, Rolled Rosettes, and Hydrangeas from last weeks tutorial.
- I also used a mason jar cut and word "Joy" for the jar. You can download a PDF of the mason jar FREE right here. If you have a cutting machine cut out whatever word you want for the jar. If you don't have a machine either write, if your talented I am definitely not, or buy some nice letter stickers to use.
- Scissors
- Glue gun
- Ribbon of choice

If you do have a cutting machine you can always grab a mason jar silhouette shape and cut that out onto any different paper. I did an example of a metallic gold jar in the above photo. But I'm gonna stick with the blue for the tutorial.
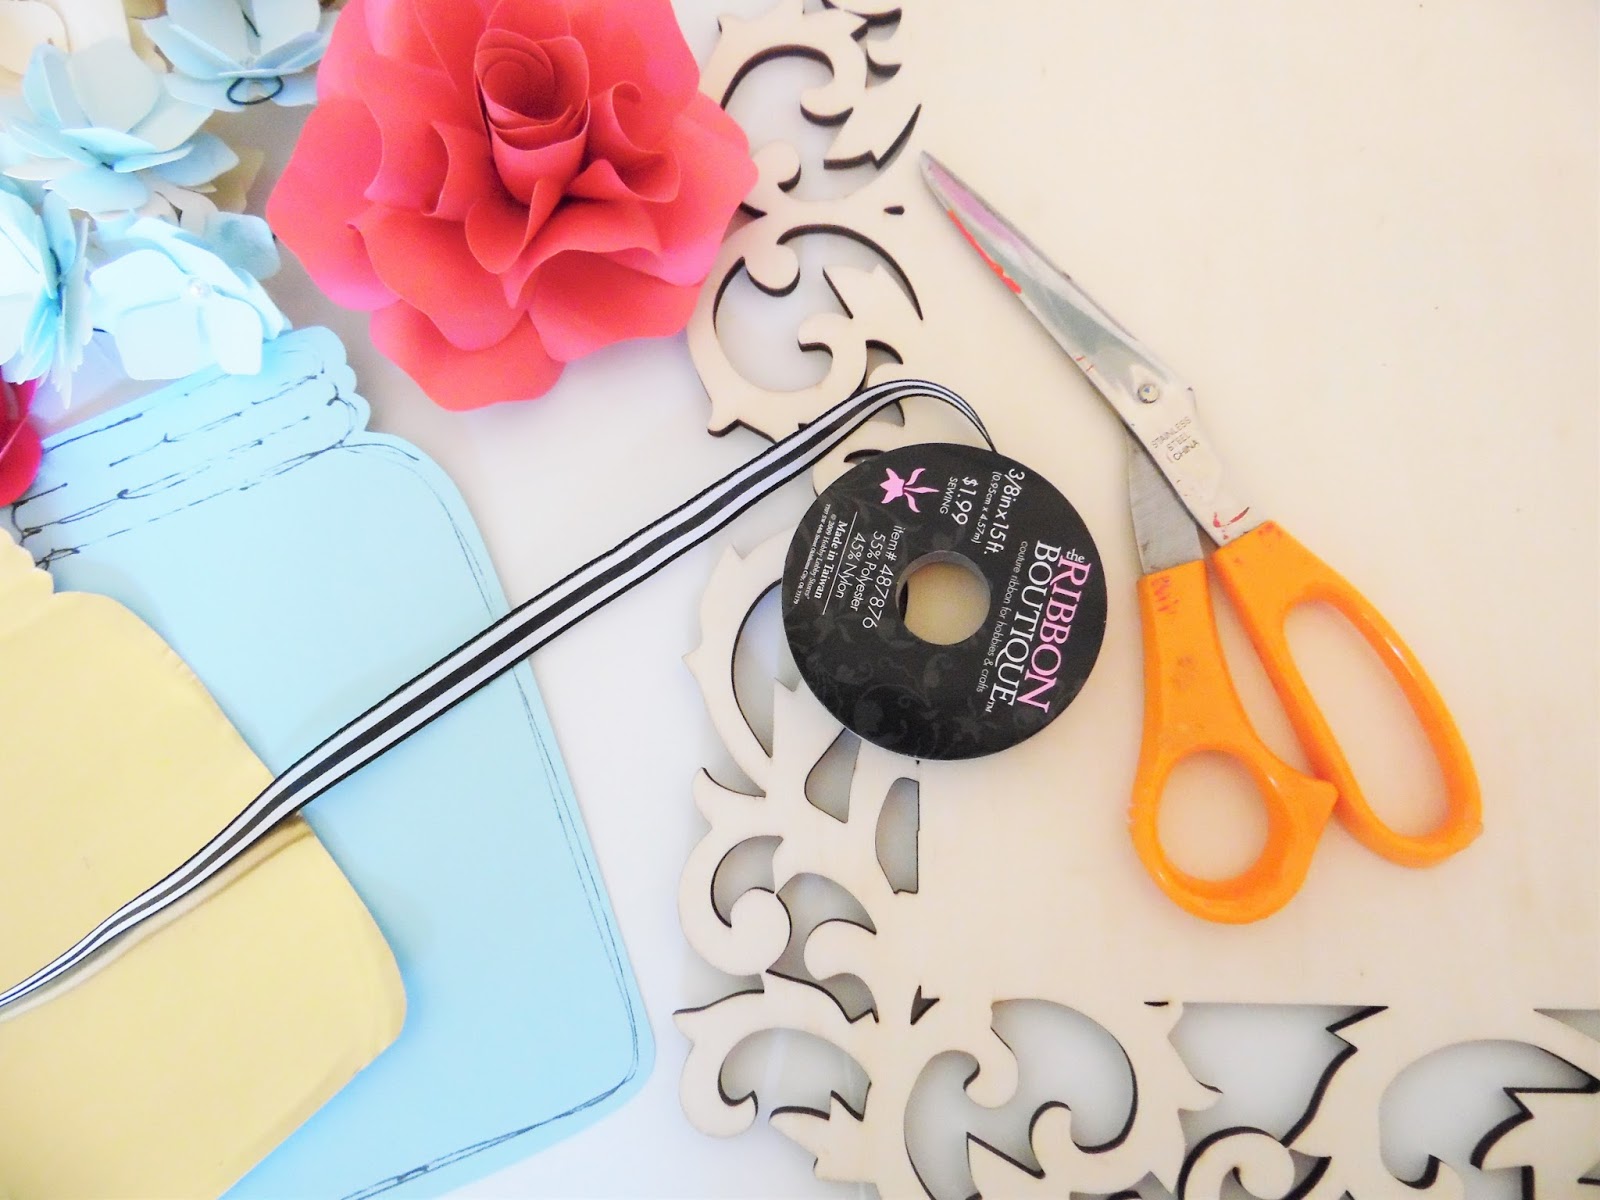
I picked a black and white stripped ribbon. We will use this to tie our project's look together at the end with a bow. Pun intended. ;-)

If you printed the mason jar PDF you will see I included 2 sizes. So if you went for the bigger frame use the bigger jar.

Go ahead now and add your wording to the inside of your jar if you like. Then glue the jar down onto the frame.

Ideally you will build your paper flowers already or go ahead and grab our silk ones and pull them off the stems. Watch the Ansley Rose video tutorial here if you love the flowers I'm working with.

Take time to play around with how you want the flowers to look and arrange them on the frame. You know that saying "measure twice, cut once." That's what we are doing here. Lay flowers twice, glue flowers once.

Try to aim for your larger flowers in the center and smaller ones on the bottom and outer edges.

If you love paper roses check out this post, In a Bed of Paper Roses to see a variety of templates and styles of the classic rose.

Once you are happy with how you want your flowers to lay on the frame go ahead and glue those paper pretties down.


Once you have your flowers down fill in the greenery and if you wish tie a bow of ribbon and add it in at the top of the mason jar.

For a more realistic look I went back and add some falling petals to the sides of the frame.
Now you're all finished! Find a spot to hang that pretty project up and give yourself a pat on the back!

A couple things I learned with this project. First you may want to use darker lettering then I did. I went with white and from a distance you can't see my word "JOY."
Second don't be afraid to do things differently, I used the frame in it's natural wood color, but you could always spray paint it or even cover the center with a pretty patterned paper and use modge podge to seal it.!
Comment below how you would design your piece of 3D paper flower wall art!

If you enjoyed this post don't forget to follow Mama's Gone Crafty and share on your favorite social media.
No comments:
Post a Comment